Revit hatch patterns are hard…
Before we begin, if you need hatch patterns check out our hatch pattern collection.
Graphical hatch patterns are a foundational component for conveying material in architectural drawings. Traditionally, graphical patterns were drawn by hand, but over time the development of pattern transfer paper was used to quickly rub repeating graphics onto a large area. This helped speed up the drafting process, but all office drafters had to familiarize themselves with office graphic standards. Once CAD became popular, it was much easier to keep graphics consistent since text files predefined a repeatable pattern that could quickly replace or scale across any drawing. These days it has become much easier to create unique graphic files with the use of built-in software tools; allowing users to easily create curvilinear shapes without dedicating hours to ensure graphics align.
What is a fill/hatch pattern?
In the context of CAD, AutoCAD “hatch” patterns are the software term to define an area with a symbolic or literal material graphic representation. For reasons unknown to me, the term “fill” pattern replaced “hatch” as the default in Revit. (If someone is a better googler than I, please let me know in the comments.) However, everyone knows what is being discussed if the word “hatch” is used.
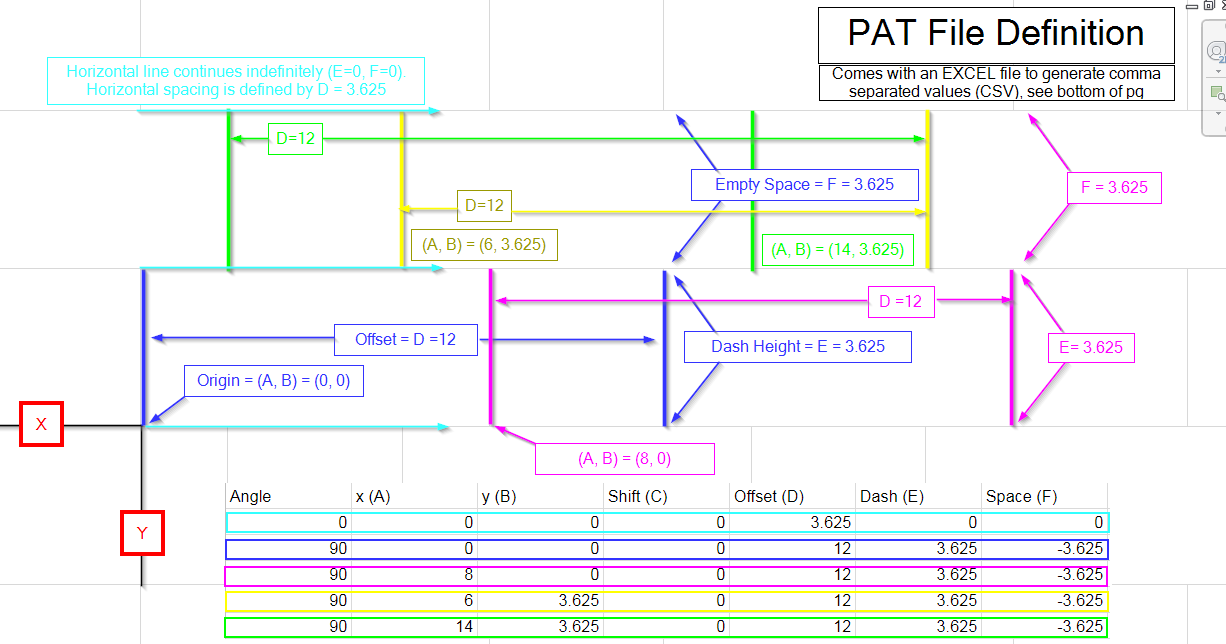
In both Revit and AutoCAD, Autodesk uses a text file with a specifically defined file extension of .PAT. Inside each Revit pattern file there are rows containing at least seven numbers separated by commas on each row. These numbers control a vector-based lines starting point, angle, and length along an x/y axis. The image below is pulled from an official Autodesk support page visually identifying what each number does. Click here to read more.
Model vs Drafting Pattern
When setting up fill patterns in Revit, there are two different pattern types: Drafting or Model.
Drafting pattern
Drafting patterns are used for graphical representation, either in the abstract or rough literal. Drafting patterns are fixed in scale, meaning if the drawing scale changes the drafting pattern does not adjust to match the new scale. 2” wide line will always be 2” wide on a standard ruler. These patterns are typically use for section cuts to quickly represent an object instead of a solid color.
Model pattern
A model pattern differs because this pattern type adjusts based on the drawing scale. Meaning, 2” wide line will adjust based on the drawing scale. Model patterns are used for elevations and floor plans to literally represent the size of materials.

How do I create a Revit fill pattern?
Historically, hatching had to be generated manually using a text file, however there are tools now to help generate files without needing tons of patience with trial and error.
Text file
As discussed above, Revit uses a .TXT file renamed with a .PAT file extension. Inside each file there are four components: the unit used (MM or INCH), fill pattern type (drafting or model), file name (this is used when Revit imports the file), and rows with at least seven numbers on each row. The text file will look similar to the image below.

Once everything is noted, simply Save As and rename the file extension to a .PAT file.
The advantage to generating individual .PAT files is they are backwards compatible with older versions of Revit. However, these files are imported and set up manually in each version of Revit.
Native revit tool
Revit comes with a simple hatch pattern tool that helps to generate simple linework patterns. This tool is also how Revit imports .PAT files.
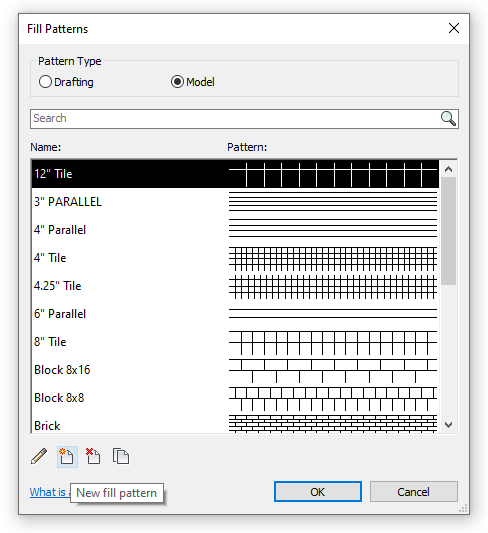
Go to Manage > Settings > Additional Settings > Fill Patterns.

Inside the Fill Patterns dialog, select either drafting of model pattern type and click New Fill Pattern in the bottom left of the dialog.
In the New Pattern dialog, a user can either create new basic single or crosshatch line patterns based on preset line spacing and angle.

The disadvantage, the tool is too limiting and only allows users to create simple fixed width patterns. It does not allow for multiple line spaces or, heck, even allow simple staggered tile patterns.
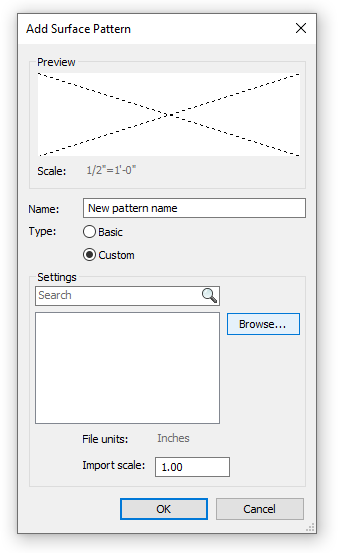
Luckily, Revit makes it easy to import pattern files (.PAT). The only issue is when the import pattern is too dense or the file includes lines that are too short. The main disadvantage is all the time spent searching for high quality patterns online when they are far and few between.
PyRevit
Since Revit has a simple pattern generator, and generally a knowledge/patience gap with users, PyRevit added an extremely helpful add-in tool for generating custom fill patterns. PyRevit itself is a set of tools that Autodesk has not created yet, or will ever, that are useful for the Revit users. If interested, PyRevit is available for download here.
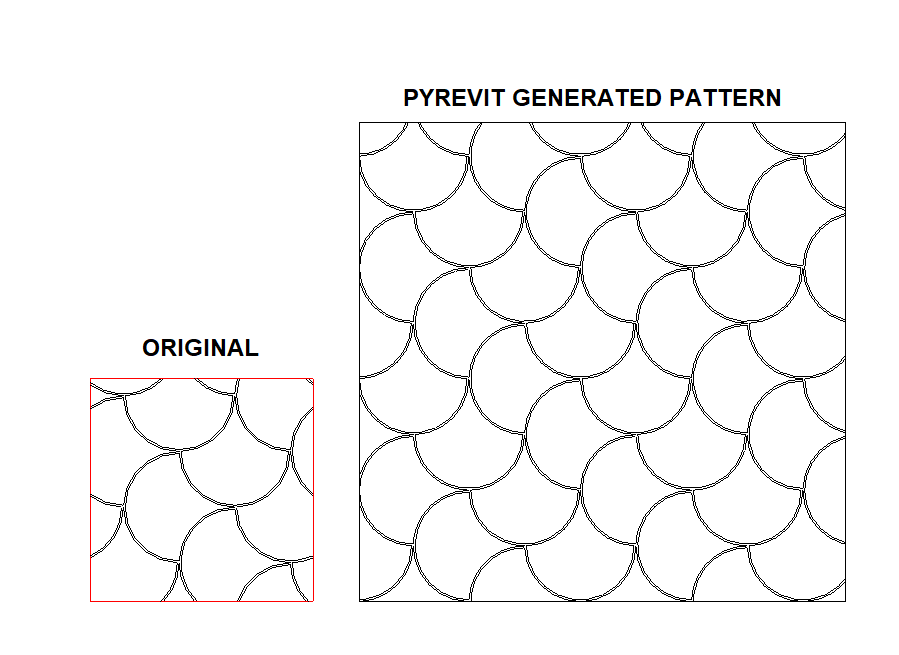
The main advantage of PyRevit is generating a pattern is as simple as selecting a drawing and clicking a button. No headache required!
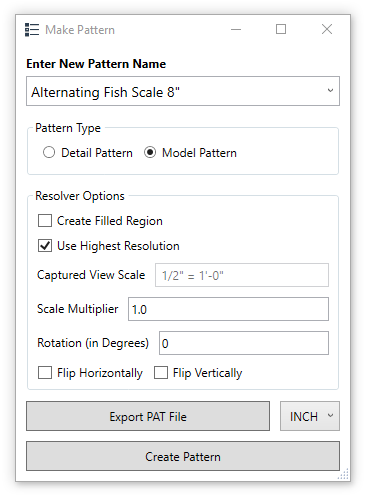
Once the desired design is set up in a repeatable pattern, highlight the lines and go to:
PyRevit > Modify > Make Pattern > Make Pattern.

Fill out the dialog per the desired pattern type and name then select Create Pattern. PyRevit will state, select the bottom left and upper right parts of the pattern area, then once complete, PyRevit will generate the custom pattern and associate a filled region!
PyRevit can also batch import Fill Patterns, as well as export individual patterns to .PAT files if you need to move patterns between Revit versions.
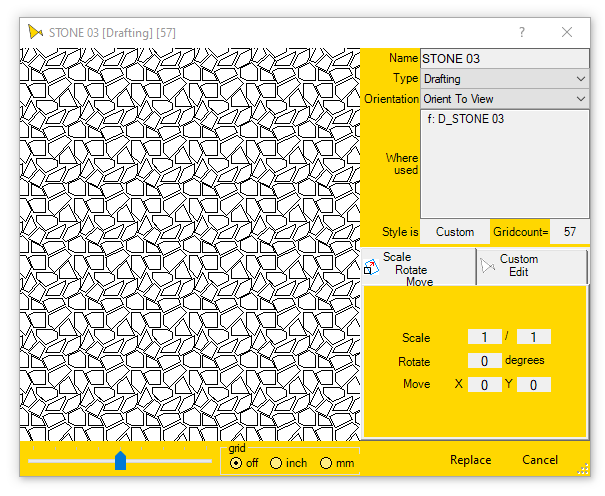
Revit Hatchkit 4 add-in

Another option is a Revit Add-in called Hatchkit 4, found in the Revit app store. This $15 paid Revit add-in is extremely helpful for adding and modifying existing patterns inside Revit.
With a click of a button users can quickly switch, or duplicate, a pattern from drafting to model without needing to update .pat file data. There is also meta data that shows where the fill pattern is used in the project, such as assembly families and filled regions, along with visually identifying fill patterns that are not used inside the project.
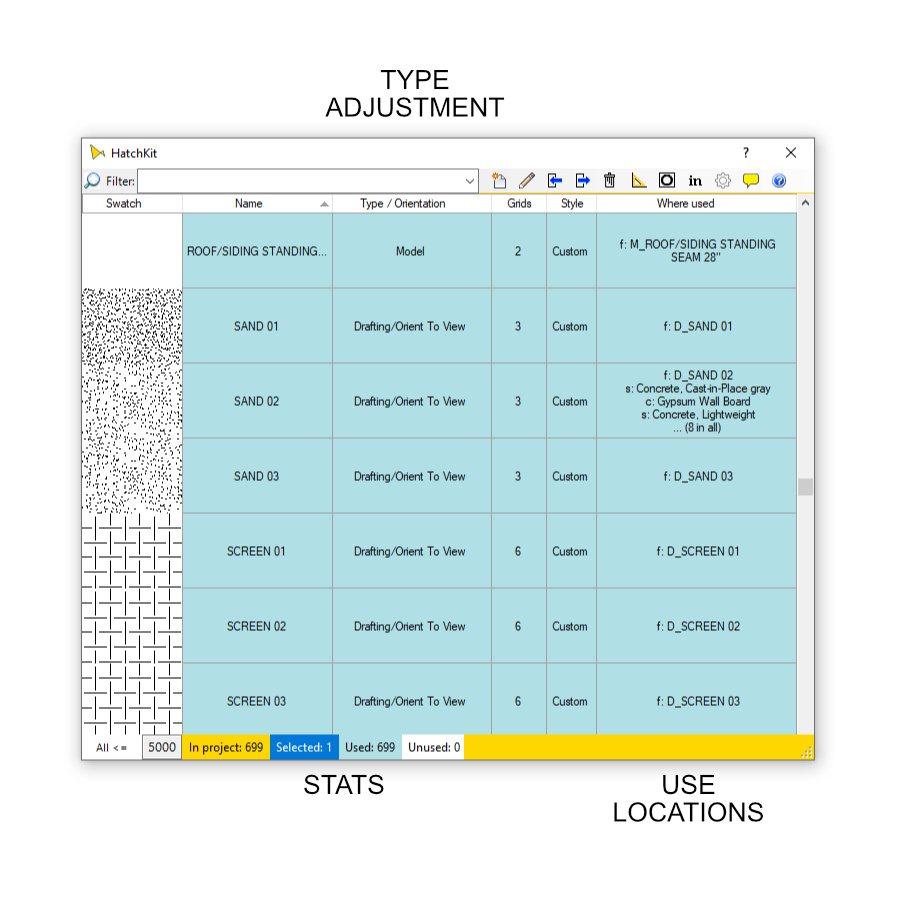
Easily update the pattern type, orientation, scale, and rotation without importing and replacing existing patterns inside Revit!
I would highly recommend checking this app out. There are trial versions available, but the full version is only one $15 payment! (The purchase only works for that Revit version.)
Filled Region vs Fill Pattern
Similarly, to how lines work in Revit, a Filled Region is separate from a Fill Pattern. A Fill Pattern generates the pattern itself and tools associate patterns from Fill Patterns, like when associating section and surface patterns in Materials from a Fill Pattern. A Filled Region is a definable hatch area with a Fill Pattern assigned.
Annotate > Detail > Region > Filled Region.

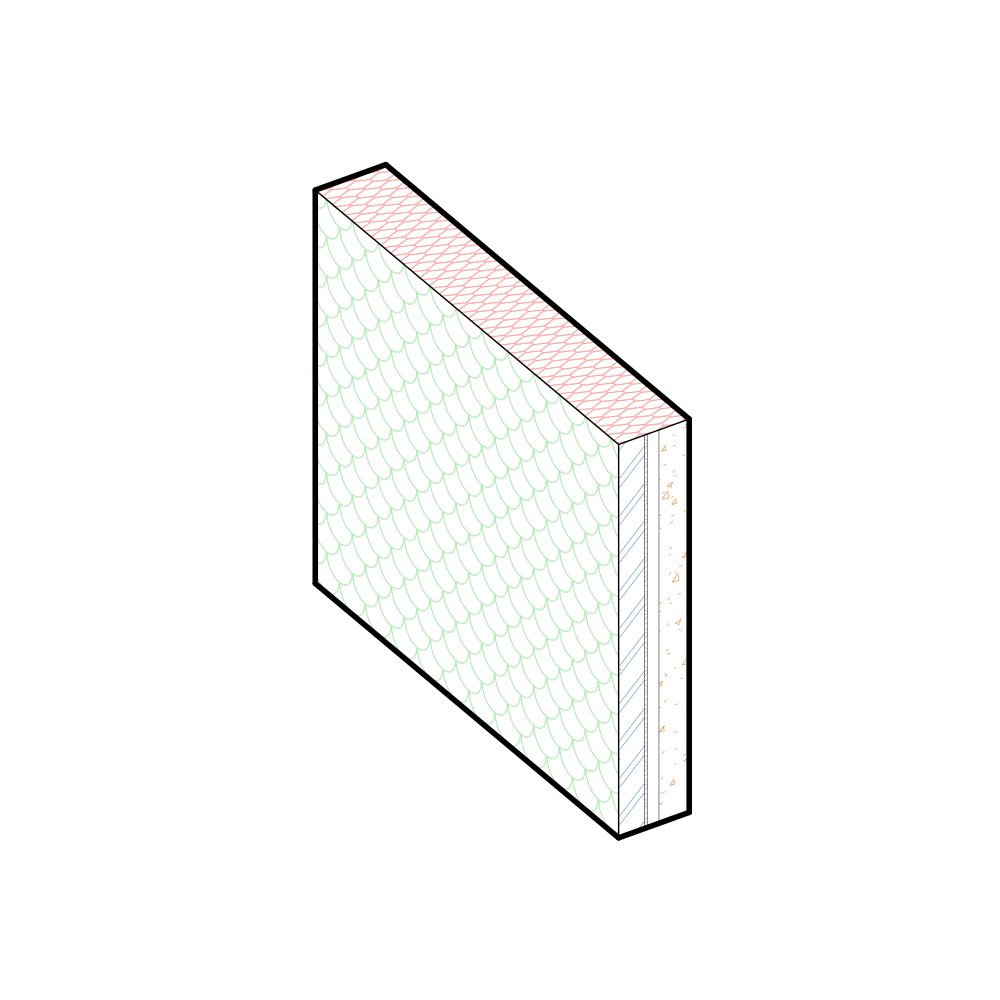
Inside the dialog box, the user can define a background and foreground fill pattern and color. A user can create any number of unique patterns to tailor a project. Like the red alternating fish scale pattern with a green dot pattern as a background below!

Where do I get Revit hatch pattern files?
A simple google search will net free links, like Revitcity.com, to individual patterns. However, it’s likely the only patterns available are similar ones that already exist in any office template or patterns not unique enough.
Luckily, we offer a collection of over 700, already set up, drafting and modeling fill patterns! Our collection is the largest, widest variety, and highest resolution collection available anywhere on the internet! (Believe us we checked.) The collection comes in one Revit file so anyone can simply copy and paste specific patterns or use the Transfer Project Standards tool to easily add our huge collection to any current or new project! Our collection comes with step-by-step instructions for generating patterns along with a tile pattern generating file to help anyone match custom pattern sizes!
Feel free to contact us if you have any questions.
