Revit window families can be better!
I do not know about you, but my Revit window library consisted of either simple windows that only adjust width and height with no flexibility for custom options, were overbuilt and confusing to modify manufacturer windows, or are bloated file sizes that slow down my project files. (I know a manufacturer wants us to have detailed models but adding a CAD plan when I cut a section is too much and it is impossible to edit!)
So…
I made better Revit window collection.
My old window library was found online, free, or came with Revit. I know, it is my own fault. It is hard to find time between projects, or during, to set up multiple families and unify graphics, parameters, and features across the board.
The existing Revit window families are serviceable but they still need work to make them really parametric. I continued to spend too much time on each project tweaking a family here and there only to not remember to use it for the next project, along with not future proofing the changes. NO MORE!
I sat myself down and put all non-critical duties aside to create a robust window family collection.
Goals:
Families must be fully parametric. This means easily swappable muntins, trim, and fully adjustable parameters for everything. I should not have to download another manufacturer family again.
Families must be light weight. (No unnecessary parameters!)
Integrated analytical parameters so I can update once, save, and only sometimes have to update energy efficiency parameters once they are loaded into the project.
Set up parameters to be schedulable. I want to see how thick my window sill is in my schedule! (Revit standards and manufacturer families do not have schedulable parameters aside from the hard baked parameters, i.e. height, width, thickness, etc…)
I want to graphically modify each component inside the project browser to suit the view I set up. This means all parameters are tweakable inside Object Styles.
This was certainly a high bar I set but satisfying to finally achieve.
Modeling Plan

When modeling families there are two camps of thought, model everything in one file or model key components in separate files and import into one file. Most free families you find online are modeled using the first method, while is feasible (in most cases) can make the file very complex and hard to troubleshoot. Not to mention there is an upper limit on objects modeled in a single family before Revit decides to stop working. The major benefit to splitting a family into smaller components is troubleshooting is easier, switching out key components for to match different styles, and keeps the file processing small.
I decided to work with the nested family modeling method to help hit all goals for the project. This splits families into key parametric components that can easily be assigned parameters. This provides order and makes modifying the model easier, especially for someone who did not make the model.
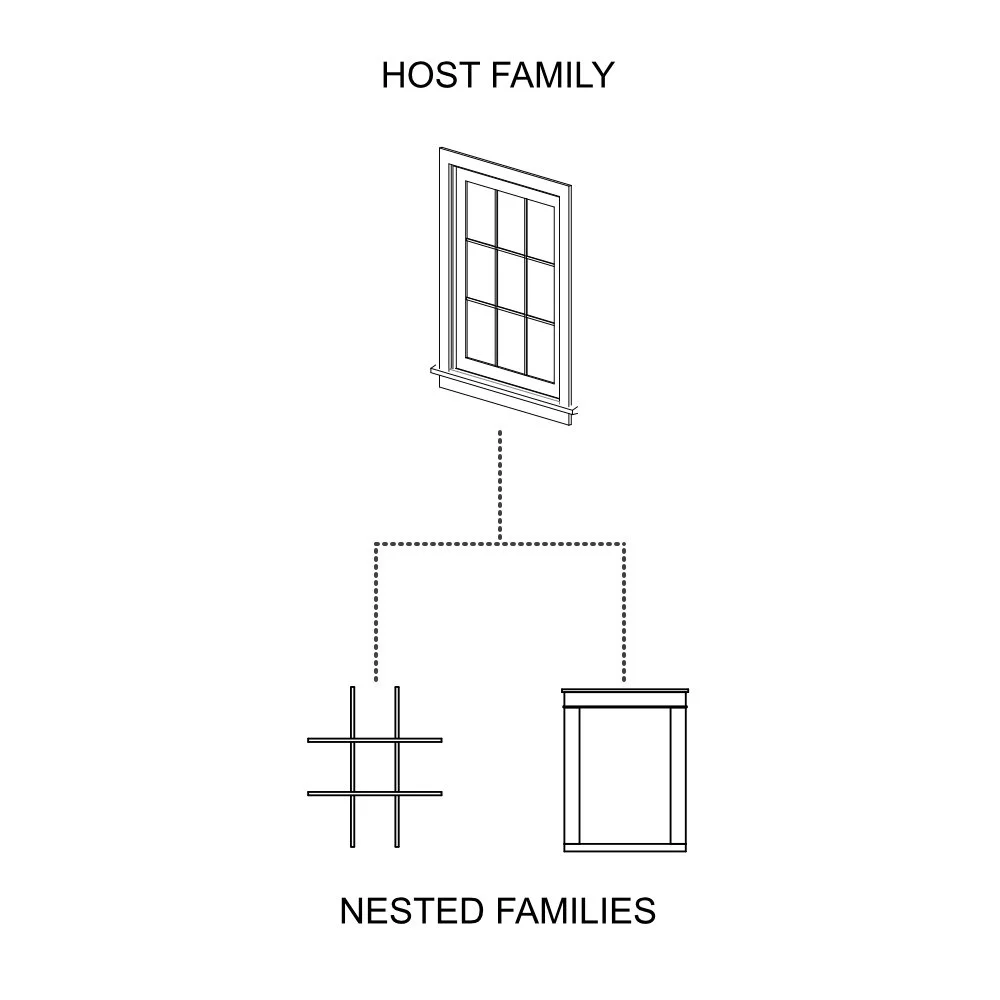
The families are broken into three essential parts:
Main hosting family (opening types)
Trim (nested component)
Muntin (nested component)
It was essential I host all parameters inside one file and not nest families on top of one another. Nesting families inside each other begins to balloon files sizes and does not make it easy for more novice users to edit.
Parameters
I also want to set up a parameters plan. One goal was to schedule as many parameters as possible. We can technically make all parameters schedulable but scheduling every parameter is not always the best option for a user experience. By default, Revit only allows certain prebuilt family parameters to be scheduled.
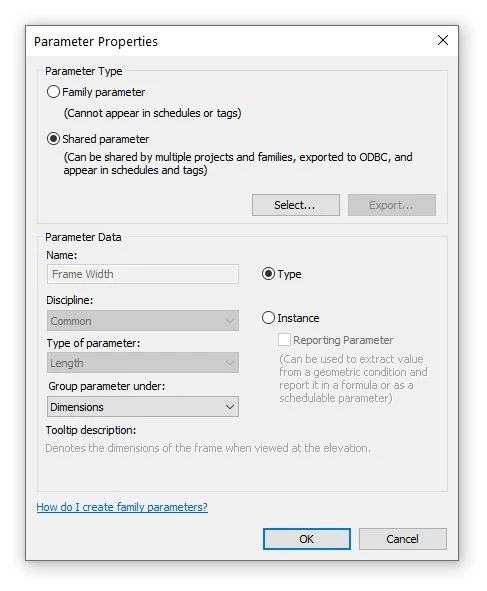
There are two ways to accomplish this, I can create parameters inside the project file and assign them to the family category (these parameter fields are not linked to the family therefore, I must manually edit every change), or use Shared Parameters which populate inside the project file once imported (these link to parameters loaded inside the project file and automatically update when you change any setting in the family). Typically, Shared Parameters should be used by default when building families for better BIM implementation, aside from a few exceptions.
(At some point in the near future I will create a post outlining the “how-to’s” for setting up shared components for new families.)
Finishing Touches
I can do this one of two ways, either I create parameters inside the project file and assign them to the family category (these parameter fields are not linked to the family therefore, I must manually edit every change), or use Shared Parameters which populate inside the project file once imported (these link to parameters loaded inside the project file and automatically update when you change any setting in the family). Typically, Shared Parameters should be used by default when building families for better BIM implementation, aside from a few exceptions.
The last item is to create the components, insert the nested components into the host family, and associate the necessary parameters. Easier said than done, but none-the-less is now done.
The best part? This modeling system is set up to be swappable for easy customization. If I need a new muntin or trim type, all I do is switch out nested components, insert into the host family, associate the new parameters and done! No new family from scratch or scraping the 10th page of google! All I had to do was swap parts. Like putting in new batteries!


I built a large 35+ library with multiple different opening styles with single, double, and triple configurations along with multiple muntin and trim styles. This way, I no longer need to waste time searching for a specific family type and I can easily mix and match my existing catalogue.
If you want more details here is the product page. If you are unsure, at the bottom of the page you can download a free door sample along with our door users guide.
Feel free to contact us if you have any questions.