Easiest Way to Straighten Angled Plans
Revit angled plans
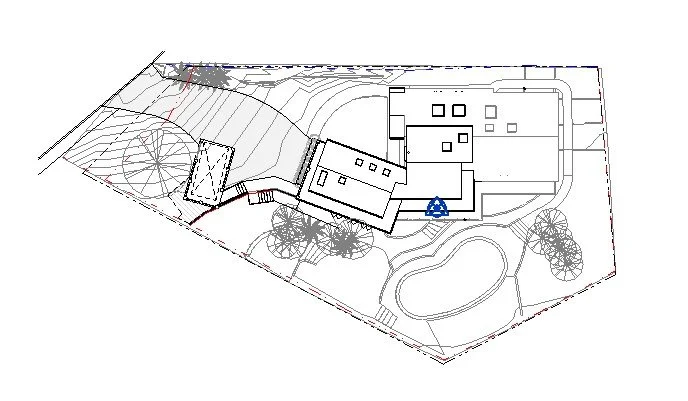
As design professionals, we come across a wide range of “uniquely” shaped spaces that questions the sanity of the previous professional. (Funnily enough, it almost always come back to the client overriding the design professional’s decision.) Whatever the case, we need to generate models and present drawings for review no matter how obtuse the plan. Which can be a real drag when the plan orientation isn’t uniform across the board. Take the image below, for example.

The full floor plan can fit on a single sheet given its “unique” shape. The trouble comes when generating enlarged plan areas at the angled section. Simply placing a callout region does not fix the problem since callouts are set based on the parent view.

Plan orientation options
How do we fix this? We have a couple of options to adjust the plan.
Project North & True North
Revit lets users set two different plan orientations and allows users to individually define a plans orientation. (I find less advanced users typically ignore this feature.) The best use case for this feature is setting the floor plans to Project North and using True North to show existing site orientation. (We will not get into it here, but True North is also important to locate for solar studies, energy analysis, heating and cooling, etc…)

To set Project and True North, follow the guide here by Autodesk.
Unfortunately for us, Project and True North are used for this project so we need an alternative.
Scope box
A Scope Box is a 3D region, similar to a Section Box in 3D views, that specifically control the visibility of elements displayed across multiple views. While a Section Box is only usable within 3D views and Crop Regions plan, section, and elevation views, both are linked to individual views and do not sync across views. Scope Boxes control visibility of Crop Regions and Section Boxes across all views with a single push/pull on any side.
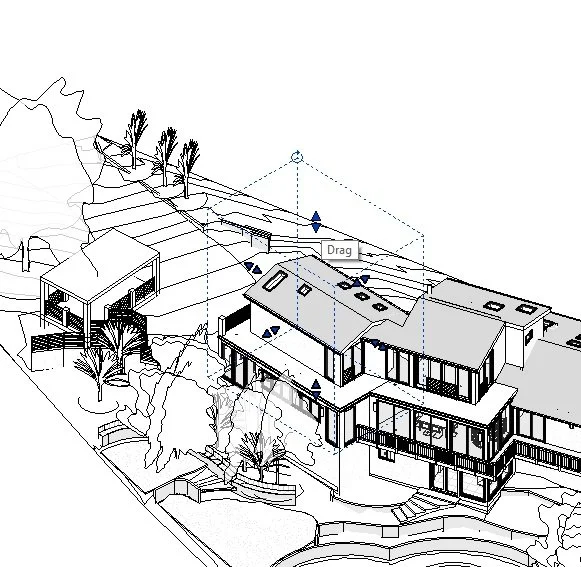
Aside from what I listed above, Scope boxes are useful because once placed and rotated to the correct orientation the plan view will automatically align the region to an orthogonal plane without messing with the original plan orientation.
Additionally, Scope Boxes can assign grids and levels to clean up drawings, but do not work within Callout Views.
How to apply a scope box
To create a Scope box go to:
View > Create > Scope Box
Before placing, make sure a name is chosen for the scope (I name based on level, then room) and a height is set. I find it best to add a large height and adjust the scope box height in 3D from there.

The Scope Box tool only allows rectilinear shapes, so users cannot draw a uniquely shaped Scope Box like a Region, and is set to an orthographic placement. After the area is set, the Scope Box will need to be rotated to the angled area using the Rotate tool.


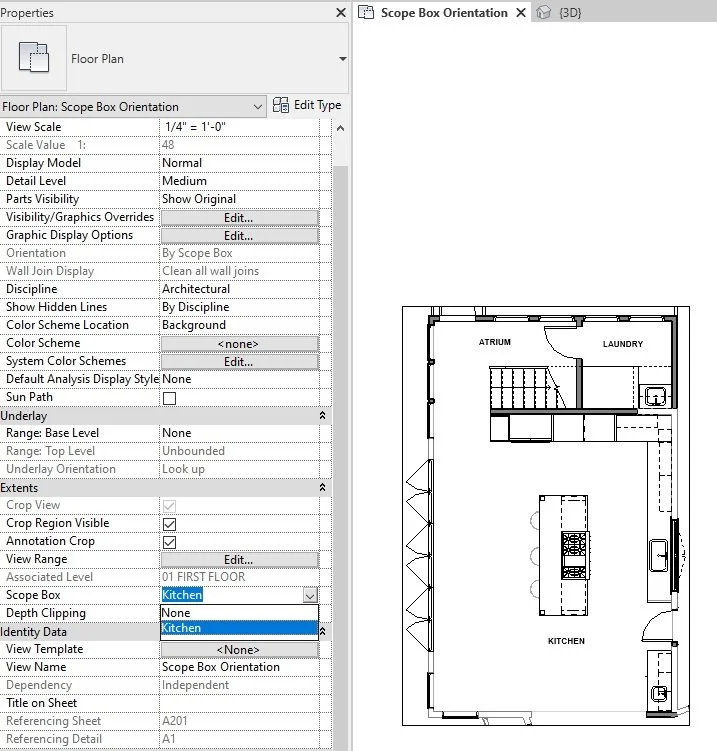
Once everything is set up, go to Extents > Scope Box in the Properties Palette and set the drop down menu to the correct Scope Box. This will automatically adjust the view Crop Region to the Scope Box extents, or Section Box in 3D, and the area will rotate to an orthogonal orientation.
Scope Boxes are visible across every view, unless specified in Visibility Graphics or using the Scope Box Visible View Dialog. If specific Scope Boxes need to not be visible on certain views, select the Scope Box and in the Properties Palette select Edit on the Views Visible parameter.
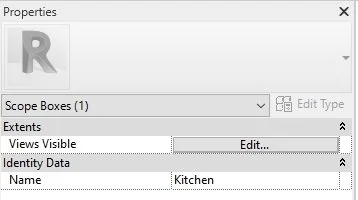
Inside the dialog, set the Override column to Invisible for each view the Scope Box should be invisible.

If there is a desire to not see any scope boxes in particular view then I would suggest turning off Scope Boxes inside Visibility Graphics and associate that change with a View Template.
I hope this helps to clean up drawings and get more people using Scope Boxes in their workflow.