Automatic Travel Distance in Revit LT

Travel distance in Revit LT
There are several differences between Revit LT and the full version. Users who use Revit LT do so because they do not feel the feature difference between the two versions justifies the cost difference. While I will not go into detail on the differences, one major missing feature in Revit LT is the automated Path of Travel tool.
The main benefit of the Path of Travel tool is the Travel distance is recalculated automatically based on floor plan changes. Which is a considerable time saving deal when processing multiple design iterations across several/large projects.
With Revit LT, users need to update the path of travel line work manually, manually select to see length and calculate the totals, then note the distances on the plans manually. Sound familiar? I bet you did not know you can short cut this process by automating the calculations through detail item families and schedules. Let me show you.
Create new detail item family
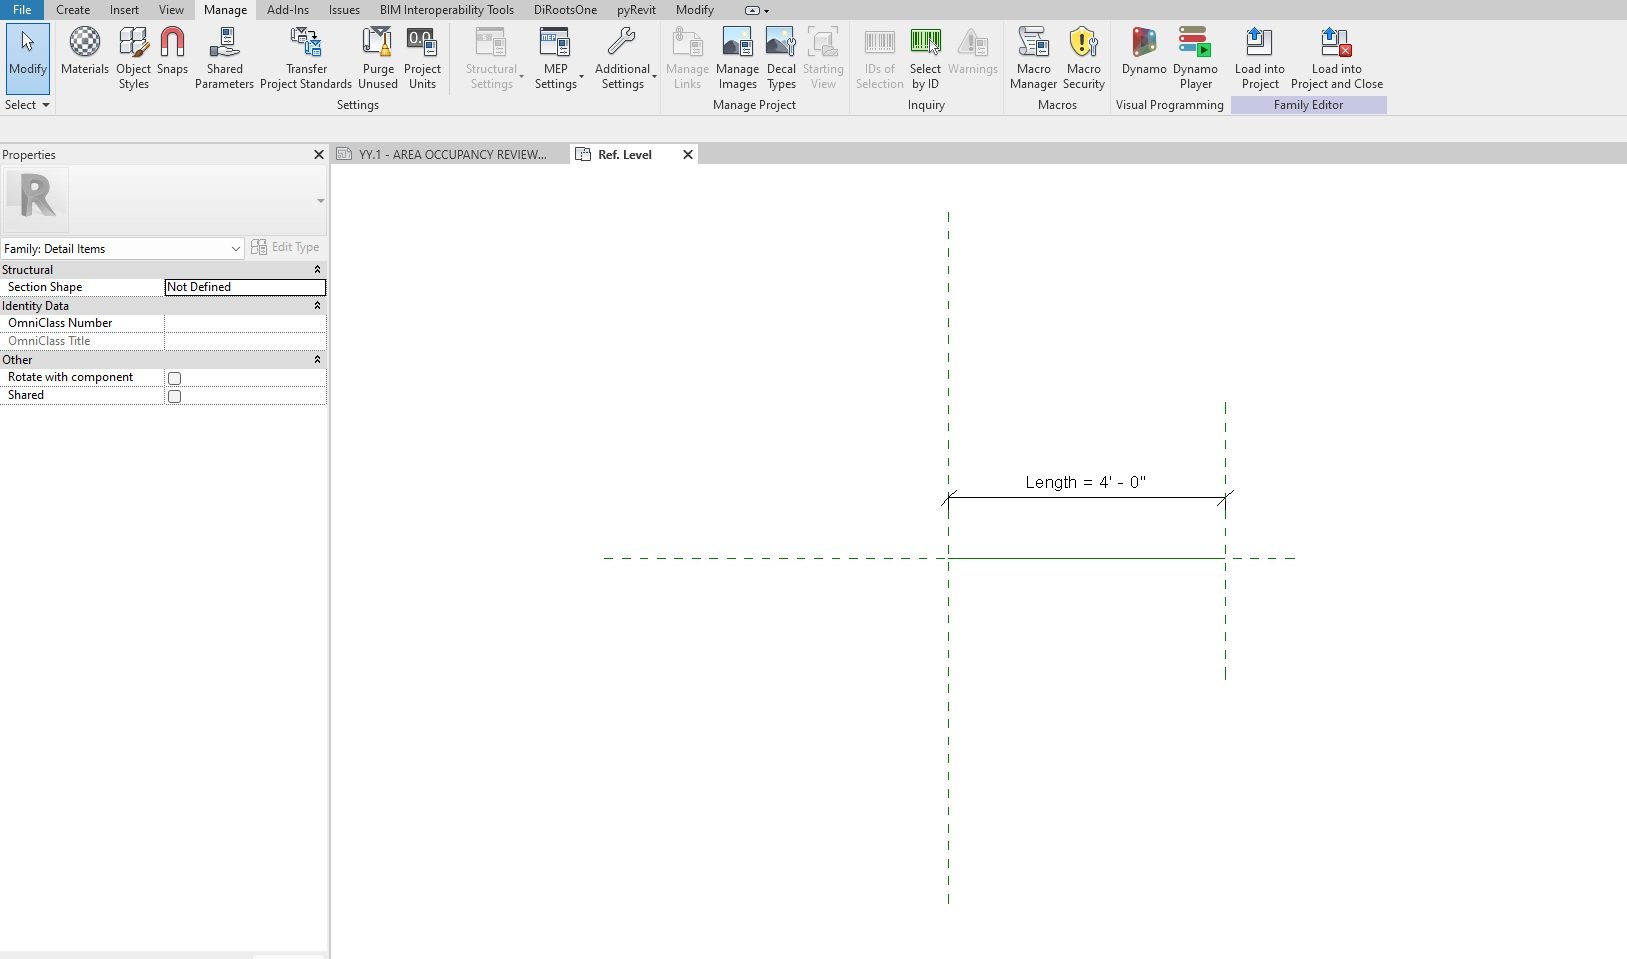
Create a new family using the Detail Item line based.rft file.
File > New > Family > Navigate to Detail Item line based.rft in the file browser
Once inside, we first want to set the structure, so the line types are independently adjustable inside the project.
Manage > Settings > Object Styles

Under the Model Objects tab, we want to create a new category type that is unique from existing categories so users can adjust graphics independently without affecting other Detail Items families in the project. To do this select the New button, set the category title (we called ours Travel Distance), set the line weight, pattern, and color, then OK to close out the dialog.
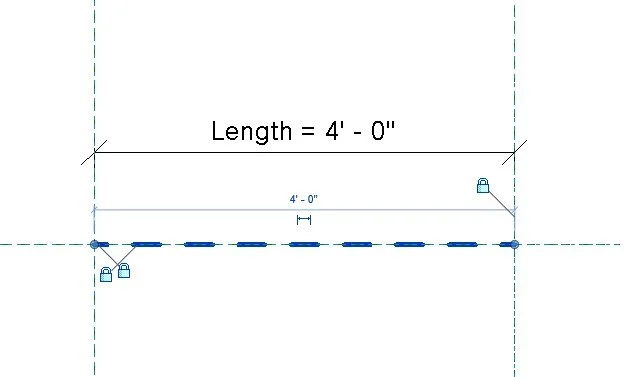
Next draw a line using the Travel Distance subcategory.
Create > Detail > Line
Align and lock the end points of the line to the left and right reference planes, then align and lock to the horizontal reference plane. This will constrain the line allowing it to flex without the family breaking once placed in the project.
Create new shared parameter
Next, we need to create a passthrough shared parameter to report the existing Length parameter. Why? This is a Revit quirk. While the line-based family includes a Length parameter, Revit will not allow users to schedule the Length parameter from a Detail Item family in the project, only through a shared parameter. This also allows users to use this shared parameter in a tag family that automatically reports the line segment length without needing to review and type out.
In the Family Types dialog, select the New Parameter button in the bottom left.

Next, click on the Shared Parameter circle and click on the Select… button. Inside the Shared Parameter dialog select the Edit… button. If you already have an existing office shared parameter file, simply add a new parameter to the appropriate Parameter Group. Otherwise, select the Create… button, name the shared parameter file, and save to your central storage. (Ensuring this file is easily found is key to ensuring this family can be used for multiple projects.)
Next create a new Group, and name it appropriately. I named mine “Travel Distance” in this example, but it might be more appropriate to use “Egress” instead.
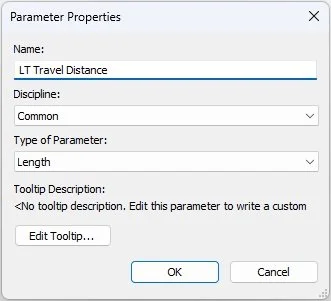
Finally, under Parameters, create a new parameter named LT Travel Distance (this can be any name that makes sense for your office), ensure the Type of Parameter is set to Length, and select OK to close the dialogs until you come back to the Parameter Properties dialog.
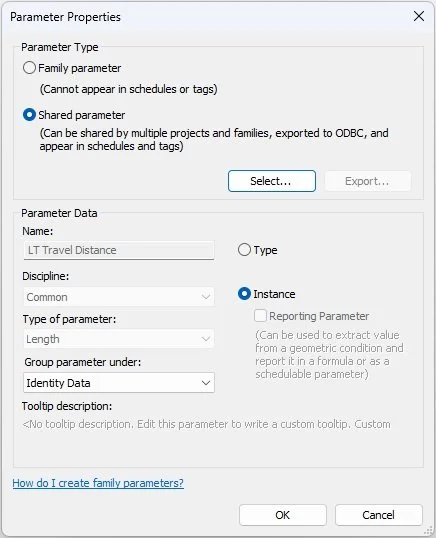
Make sure the new shared parameter is set to Instance and the Group is whatever matches your office standard. Once finished, inside the Family Types dialog, set the new parameter formula to equal the Length parameter (this will report the Length parameter in the new shared parameter), fill out the Description parameter with “Travel Distance” so the family is identifiable inside the project schedule, and select OK to close out.
Created detail item tag
Next, we need to create a Detail Item tag. (This is not necessary for the detail item family to work but is helpful for visually reporting segment lengths on plan. Feel free to skip this part if you do not need it.)

To start open a new Generic Annotaitons.rft family. (This is because Revit does not include a Detail Items Tag family template file.) Firstly, we want to recategorize the file to a Detail Item Tag, otherwise the family will not tag Detail Item families.

Modify > Properties > Family Category and Parameters > Inside the dialog navigate to Detail Item Tag and select OK

Next, we need to create a Label:
Create > Text > Label > Place Label
Add shared parameter to tag
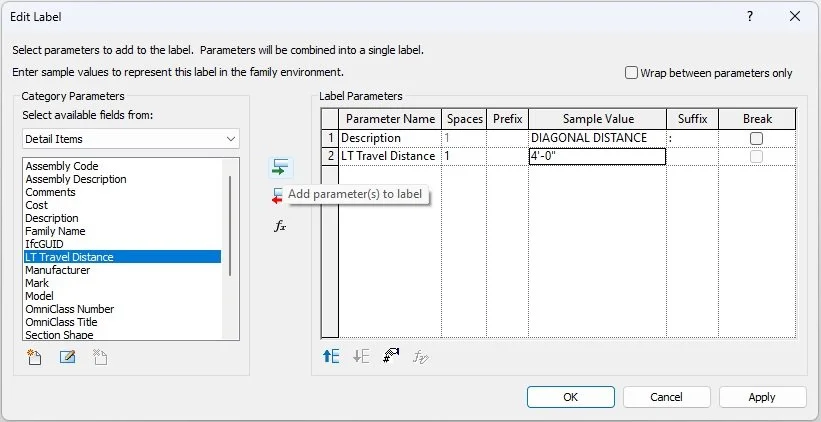
Inside the Edit Label dialog, we need to add two parameters: Description and our LT Travel Distance shared parameter. To add the shared parameter, select New Parameter in the bottom left of the dialog. Click Select…, highlight LT Travel Distance, hit OK to close the dialogs. Next add the two parameters to the Label Parameters window and provide sample values to match our example.
Set tag units
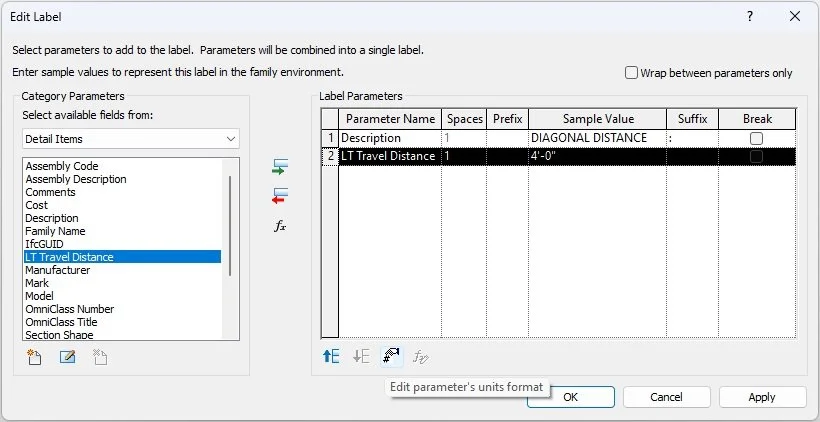
Before closing out, highlight LT Travel Distance and select the Edit parameter’s units format.
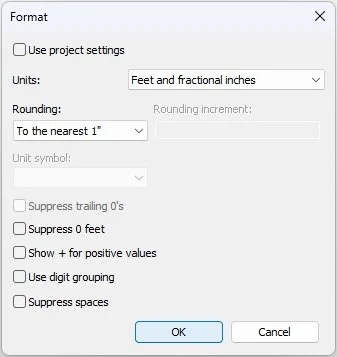
We want the format to show rounding to the nearest inch instead of defaulting to the project settings. (The units can be set to municipal standards, but most authorities I have dealt with only want to see to the nearest inch.) Once complete, hit OK to close out the dialog, save the file, and load into the project.
Create travel distance schedule
Before setting up the schedule, place a couple travel distance detail items on a plan to ensure everything is working.

Annotate > Detail > Component > Detail Component
Then tag the travel distance detail items with the loaded tag.
Annotate > Tag > Tag by Category
If everything is working, we can now set up the schedule.

View > Create > Schedules > Schedule/Quantities (or right click Schedules/Quantities in the Project Browse)

In the New Schedules dialog, scroll to Detail Items category and name the schedule.
Under schedule properties we want to add three parameters to the Schedule fields column: Description, Mark, and LT Travel Distance (shared parameter). This will allow us to filter, group, and sort detail items for projects with multiple paths of travel.
Schedule Filter
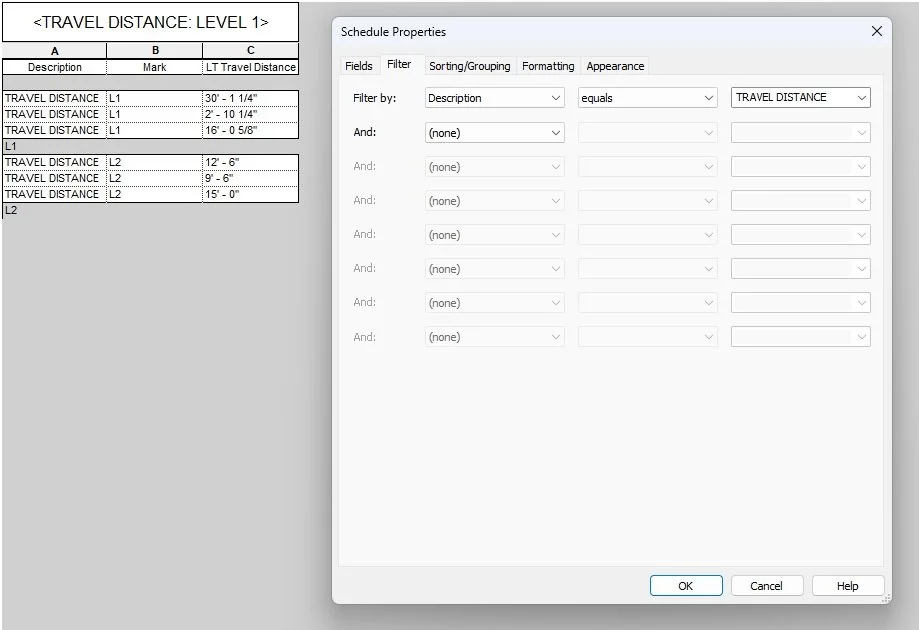
Once the schedule is generated it will populate with all instances of detail items in the project. To filter out what we need we set the filters by the Description parameter with the label Travel Distance.
Schedule Sorting/Grouping
Since projects can require multiple paths of travel, users can also group the schedule by Mark. This will require users to manually set the Travel Distance Mark parameter. (We set the group of lines used to calculate the total distance with the same label. Revit will pop up a warning on duplicate Mark but you can ignore this. If users wish to avoid these warnings, simply use a naming scheme like 1.2, A-1, etc. and set the filter appropriately.)
Starting in Revit 2023, schedules placed on sheets can filter based on instances only present in the sheet. This means users do not need to create multiple schedules based on level.
Schedule Formatting
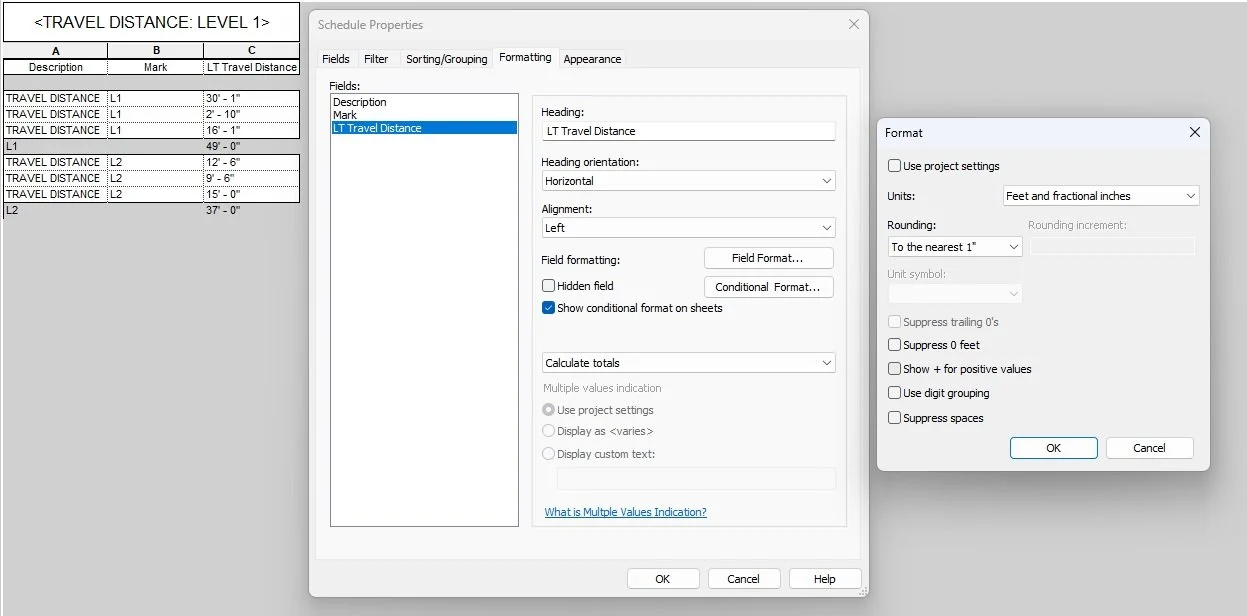
Lastly, we need the schedule to automatically calculate total travel distance. To do this, under the Fields tab, highlight the LT Travel Distance parameter and set the schedule to calculate totals. Also, select Field Format… and adjust the units format to match project requirements. (We use rounded to the nearest inch as mentioned earlier in the tag family section.)
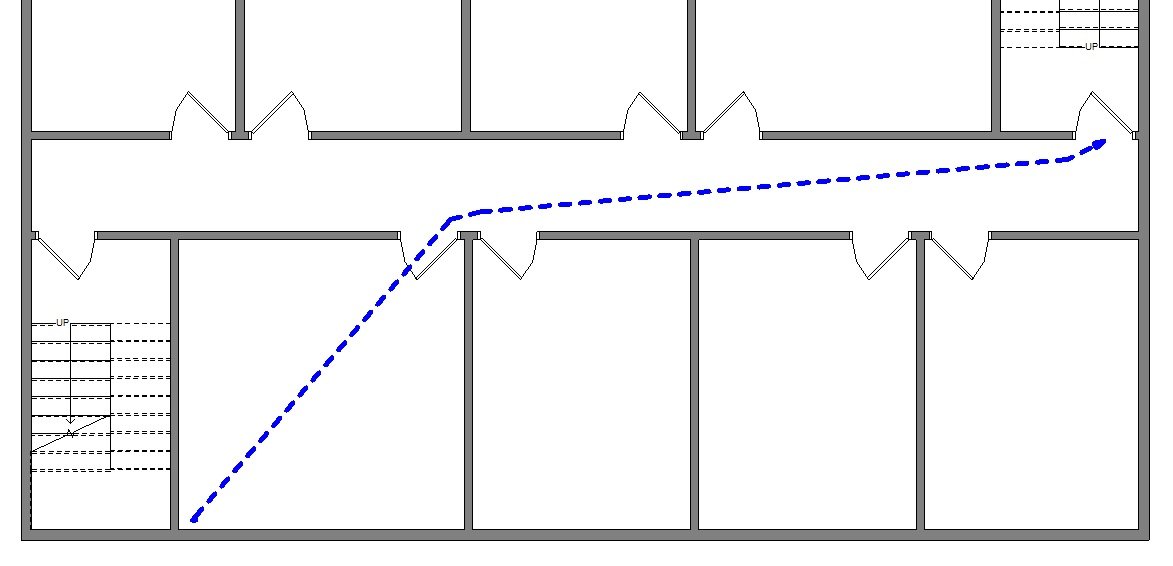
Calculate travel distance
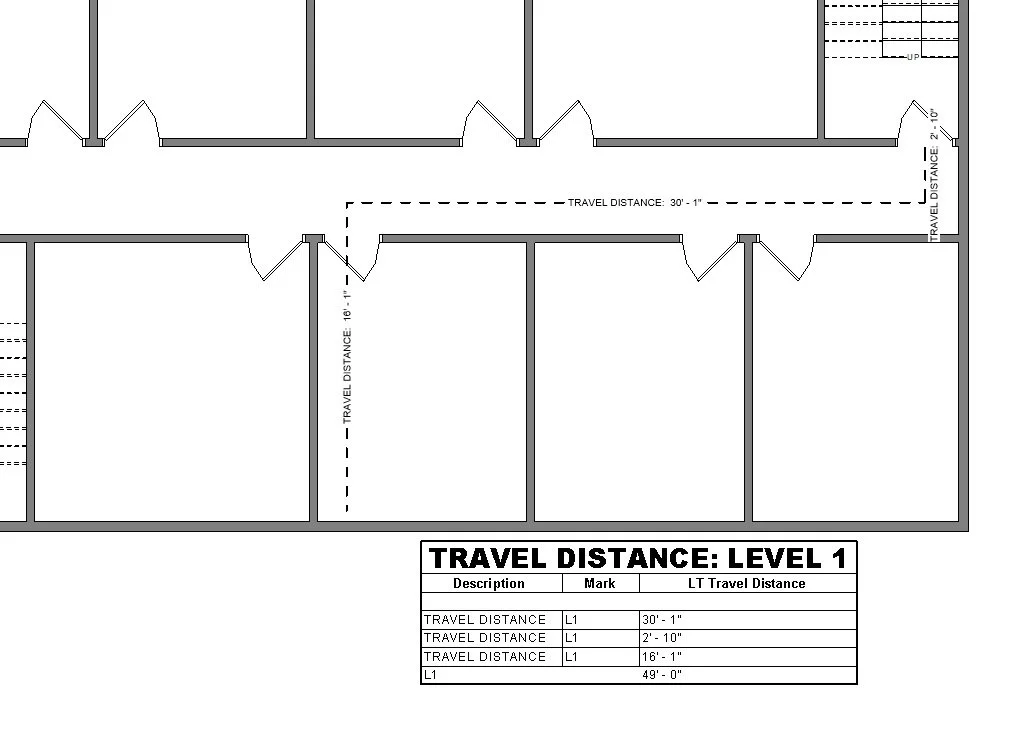
Now we can place the floor plan and schedule on a sheet and see the fruits of our effort!

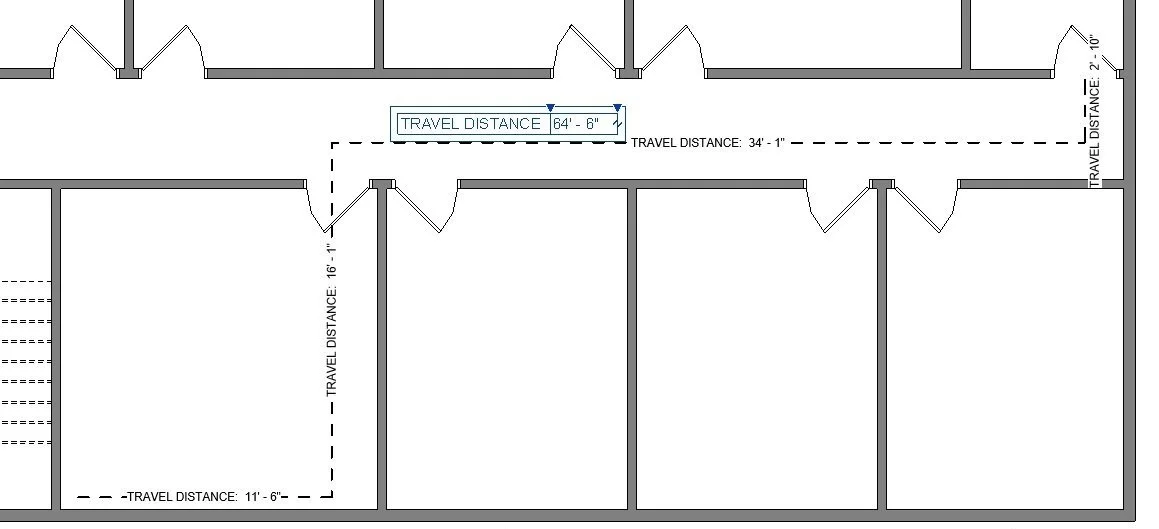
The schedule will now automatically update the total travel distance shown on the floor plan!
While the lines will not automatically update once a door is moved, users only need to adjust the lines and Revit will do the rest of the work. This will significantly cut time spent on updates or missed updates only to be called out in the next review cycle.
Extending travel distance calculation options
Users can even take the automated schedule a step further by stripping down the schedule until there is only a calculated total creating a pseudo-travel distance tag on a sheet using a schedule. Going even further by adding conditional formatting and formulas to the schedule that will change cell colors if the travel distance exceeds code thresholds.
Additionally, since we created a family with an individual model category, users can adjust the style of the line for each view under Visibility/Graphics Override.
If you would like to skip creating this for yourself we have a free file you can download with an example. Simply fill out the form below!